Python is a versatile programming language that’s easy to learn and widely used. This guide will walk you through the steps to download and install Python on Windows, Linux, and macOS, as well as how to set up your environment for Python development.
I. Downloading Python
For Windows:
1. Visit the Official Python Website:
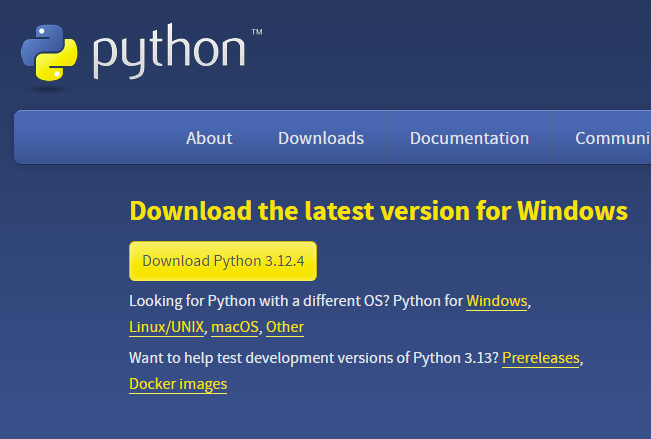
Go to the Python downloads page.

2. Choose the Latest Version:
- Click on the download link for the latest version compatible with Windows. Locate a reliable version of Python 3, preferably version 3.10.11, which was used in testing this tutorial.
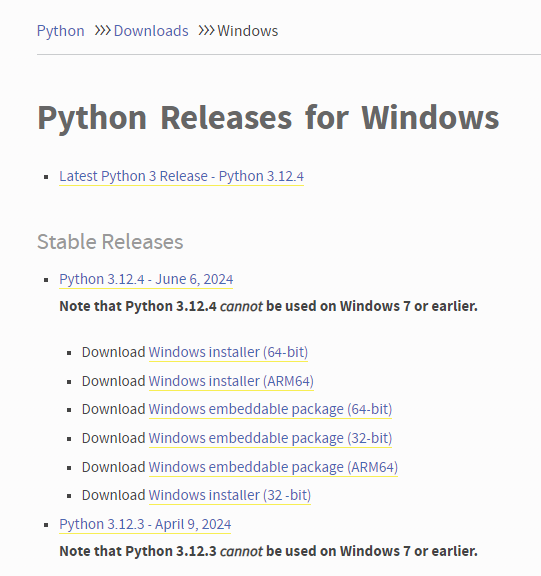
- Choose the correct link for your device from the options provided: either Windows installer (64-bit) or Windows installer (32-bit) and proceed to download the executable file. The installer will be .exe file.

For Linux:
Use Package Managers:
Most Linux distributions come with Python pre-installed. To check if Python is already installed, open your terminal and type:
python --versionIf it’s not installed, you can use the following commands based on your distribution:
1. Ubuntu/Debian:
sudo apt update
sudo apt install python3
2. Fedora:
sudo dnf install python3For macOS
1. Install Homebrew (if not already installed):
Open your terminal and enter:
/bin/bash -c "$(curl -fsSL https://raw.githubusercontent.com/Homebrew/install/HEAD/install.sh)"2. Download Python:
After installing Homebrew, run:
brew install pythonII. Installing Python
For Windows
Step 1: Select Version to Install Python
- For Windows users, see the official Python download page at https://www.python.org/downloads/. Locate a stable version of Python 3, preferably 3.10.11, which was used to test this tutorial.
- Select the appropriate link for your device: Windows installer (64-bit) or Windows installer (32-bit), then download the executable file.
Run the Installer:
Double-click the downloaded .exe file.

Step 2: Download the Python Installer.
To open the Python installer for installing python, download it and double-click the.exe file (e.g., python-3.12.4-amd64.exe). In order to provide all computer users access to the Python launcher, check the box next to “Install the launcher for all users.” To allow users to run Python from the command line, click the Add python.exe to PATH checkbox.
Setup Wizard:
- Make sure to check the box that says “Add Python to PATH.”
- Click “Install Now” and follow the prompts.
After Clicking the Install Now Button the setup will start installing Python on your Windows system. You will see a window like this.

Step 3: Running the Executable Installer
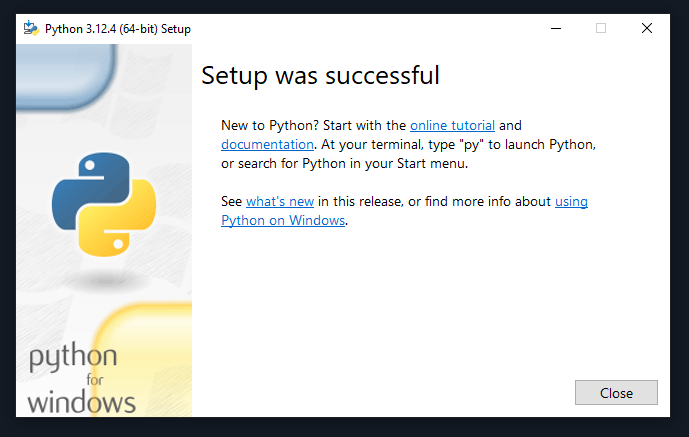
After completing the setup. Python will be installed on your Windows system. You will see a successful message.

Step 4: Verify Python Installation in Windows.
After installing Python, dismiss the window. To check if the installation was successful, use the command line or the Integrated Development Environment (IDLE). To access the command line, navigate to the Start menu, enter “cmd” in the search box, and select Command Prompt.
python --version
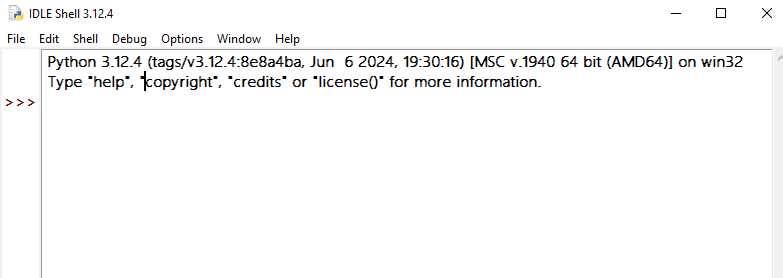
- You can also check the Python version by launching the IDLE application. Go to Start, type IDLE into the search bar, and then select the IDLE app, for example, IDLE (Python 3.12.4 64-bit). If you see the Python IDLE window, you’ve successfully downloaded and installed Python on Windows.

For Linux – Python 3.14 Installation
Python is usually installed via package managers. Follow the instructions above to install Python using your distribution’s package manager.
Check if Python already exists
Most of the Linux OS has Python pre-installed. To check if your device is pre-installed with Python or not, just go to the terminal using Ctrl+Alt+T.
Now run the following command:
For Python2
python --versionFor Python3.x
python3.x --versionStep 1: Updating and Upgrading Operating System
Before installing Python 3.12 using APT in Linux (Ubuntu), we need to update the operating system. To upgrade the operating system, execute the command listed below.
sudo apt update
To upgrade the operating system, use the command mentioned below.
sudo apt upgrade
Step 2: Add deadsnakes PPA to your system’s package sources
- The Deadsnakes PPA, maintained by the Ubuntu community, is a popular and reliable repository. It offers the most recent Python versions, including development and unstable releases that may not be accessible in the official Ubuntu repository.
- Using the deadsnakes PPA allows access to the most recent Python versions because official Ubuntu repositories often fall behind. By adding the deadsnakes PPA to your system’s package sources, you can install the newest Python versions from this repository.
Install the prerequisites for adding PPAs:
- This command installs the software-properties-common package, which contains the tool add-apt-repository.
- This utility allows you to add new package repositories, such as the Deadsnakes PPA, to your system’s source list.
sudo apt install software-properties-common -y
Adding deadsnakes PPA:
This command adds the deadsnakes PPA to your system’s package sources list. ).
The ppa:deadsnakes/ppa part specifies the PPA location, which is hosted on Launchpad (it is a software collaboration platform used by Ubuntu and other distributions).
sudo add-apt-repository ppa:deadsnakes/ppaWe have to update apt after we have installed repository.
sudo apt updateStep 3: Installing Python3.13 or Python 3.14 in Linux
Now we can install python3.13using command mentioned below. Below example is for the version 3.13:
sudo apt install python3.13Installation of Python 3.13.:

Step 4: Verifying the Installation of python3.13 in Linux
In order to verify the installation of python3.13in linux we can simply display the version of python3.13 by using the command mentioned below.
python3.13 --version
Step 5: Installing PIP in Linux
If you have used apt to install python3.13 then you might have to install pip3.13 version manually, to do so the command is mentioned below:
curl -sS https://bootstrap.pypa.io/get-pip.py | python3.13Step 6: Verify Installation of pip3.13
To verify the installation of pip3.13 in Linux we can use the commands mentioned below:
pip3.13 -VFor macOS
Download Homebrew Package Manager
If you don’t have homebrew installed on your system, follow the steps below Open the Terminal Application of macOS from Application -> Utilities. Bash terminal will open where you can enter commands Enter the following command in the MacOS Terminal.
/bin/bash -c "$(curl -fsSL https://raw.githubusercontent.com/Homebrew/install/HEAD/install.sh)"Once you run the Homebrew command to install Python, it will automatically handle the installation. (See below).
Install Python’s Latest Version on macOS
To install Python on macOS, open the Terminal and enter the following command:
brew install pythonPython 3 will be installed on your Mac after the command processing is complete.
Check Python Version on Mac
To verify the installation enter the following commands in your Terminal app.
python3 --versionDone!! Python is installed on your computer.
III. Setting Up Your Environment
Verify Python Installation
After installation, verify that Python was installed correctly by opening your terminal or command prompt and typing:
python --versionor
python3 --versionInstall a Code Editor
Choosing the right code editor can enhance your coding experience. Here are a few popular options:
- VS Code: A powerful and lightweight code editor with great support for Python. Install it from Visual Studio Code.
- PyCharm: An IDE specifically for Python, available in both a free and paid version. Download it from JetBrains.
Set Up a Virtual Environment
Creating a virtual environment is recommended for managing dependencies for your Python projects. Here’s how to set it up:
1. Install virtualenv:
pip install virtualenv2. Create a Virtual Environment:
Navigate to your project directory and run:
virtualenv venvActivate the Virtual Environment:
Windows:
venv\Scripts\activateLinux/macOS:
bash source venv/bin/activateSummary
Installing Python is the first step toward becoming a proficient programmer. By following this guide, you’ve learned how to download and install Python on Windows, Linux, and macOS, and how to set up your environment for Python development. Start coding and explore the vast possibilities Python has to offer!
Discover more from lounge coder
Subscribe to get the latest posts sent to your email.

